


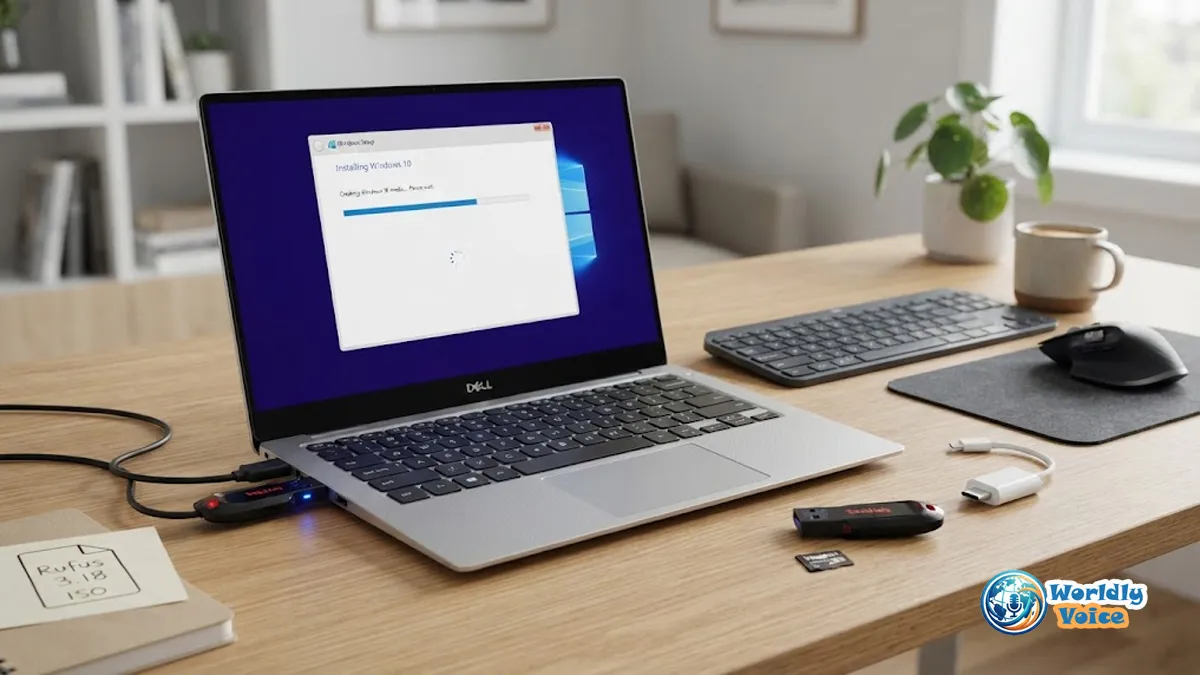
Creating a Windows 10 installation USB is useful when you need to reinstall the operating system, perform a clean installation, or set up Windows on another compatible computer. If you want to create Windows 10 bootable USB media, the simplest approach is Microsoft’s Media Creation Tool. If you already have an official ISO file, Rufus gives you more control over how the USB is prepared.
There is one important 2026 consideration before you begin: Windows 10 reached its standard end of support on October 14, 2025. Microsoft no longer provides normal free security updates, feature updates, or technical support for Windows 10 22H2. Eligible devices can use Microsoft’s Extended Security Updates (ESU) program for additional security coverage, but if your PC supports Windows 11, upgrading is generally the better long-term choice.
With that distinction clear, here’s how to create the installation media safely.
What You Need to Create a Windows 10 Bootable USB
Before starting, gather these items:
- A blank USB flash drive with at least 8 GB of storage.
- A working Windows PC with a reliable internet connection.
- Enough storage space to download the installation files.
- The appropriate Windows 10 edition and architecture for the target computer.
- A valid Windows license or an existing digital license where applicable.
- A backup of anything important stored on the USB.
Microsoft specifically recommends an empty USB drive because creating installation media deletes its existing contents.
A USB drive larger than 8 GB is perfectly fine. In practice, using a reputable 16 GB or 32 GB drive can also be convenient, but capacity alone does not determine whether a USB is bootable.
Important: Do not keep personal files on the USB you plan to use for installation. The creation process can completely reformat it.
Windows 10 in 2026: What You Should Know
Windows 10 version 22H2 was the final standard release, and its normal support ended on October 14, 2025.
That does not mean an existing Windows 10 PC suddenly stops working. Microsoft says computers running Windows 10 continue to function after the end-of-support date. The issue is that standard security and quality updates are no longer provided unless the device is covered by an applicable support program such as ESU.
Microsoft’s current guidance recommends moving eligible computers to Windows 11. For people who need to keep using Windows 10 temporarily, the Consumer ESU program can extend security protection on eligible devices.
So, if you are preparing an installation USB in 2026, consider the target computer carefully. Windows 10 may still be appropriate for compatibility, software, hardware, or organizational reasons, but it should not be treated as a normally supported operating system.
Method 1: Create Windows 10 Bootable USB With Media Creation Tool
For most people, Microsoft’s Media Creation Tool is the easiest method. It downloads the required Windows installation files and prepares the USB as installation media.
Microsoft continues to document this process on its official Windows 10 download page.
Step 1: Download the Windows 10 Media Creation Tool
Go to Microsoft’s official Windows 10 download page and find the section for creating Windows 10 installation media.
Microsoft Windows 10 download page
Under the installation-media section, select the download option for the Media Creation Tool.
Avoid downloading the tool from file-sharing websites or unofficial software repositories. The official Microsoft source reduces the risk of using modified or tampered installation files.
Step 2: Run the Media Creation Tool
Open the downloaded executable. Windows may ask for administrator permission before allowing it to make changes.
Accept the applicable license terms.
The tool will then ask what you want to do.
Step 3: Choose the Installation-Media Option
Select:
Create installation media (USB flash drive, DVD, or ISO file) for another PC
Then select Next.
This option is appropriate when your goal is to create a Windows 10 USB installer rather than simply upgrade the PC you’re currently using.
Step 4: Choose Language, Edition, and Architecture
The tool will present options for the Windows installation media.
Depending on the PC and tool configuration, you may be able to choose the language, Windows edition, and architecture.
For most modern compatible computers, 64-bit (x64) is the appropriate architecture. If you are preparing media for an older computer, verify its processor architecture before proceeding.
Microsoft specifically advises checking whether the target PC uses a 32-bit or 64-bit processor before creating installation media.
Step 5: Select USB Flash Drive
Choose:
USB flash drive
Select Next.
The tool will display available removable drives. Carefully identify the USB you intend to use.
If more than one USB storage device is connected, double-check its drive letter, name, and capacity before continuing.
Step 6: Let Microsoft Create the Installation Media
The Media Creation Tool will download the required Windows files and prepare the USB.
The time required depends largely on your internet connection, USB performance, and Microsoft’s download servers.
Do not unplug the USB while the process is running.
When the tool reports that the USB is ready, safely eject it if you are not immediately going to use it.
IMAGE PROMPT: “Editorial-quality close-up of a Windows PC creating Windows 10 installation media on a USB flash drive, computer monitor showing a generic installation-media progress interface without readable brand text, USB drive connected to the computer, clean modern desktop environment, realistic lighting, over-the-shoulder perspective, no article title or decorative text”
Alt Text: “Computer creating Windows 10 installation media on a USB flash drive”
CAPTION: “Microsoft’s Media Creation Tool can download Windows 10 files and prepare a bootable USB installation drive.”
How to Make Windows 10 Bootable USB From ISO
An ISO is a single image file containing the contents and boot information of installation media. If you already have an official Windows 10 ISO, you can use a utility such as Rufus to turn that ISO into a bootable USB.
Microsoft also provides Windows 10 ISO-related download options through its software download resources.
The basic workflow is:
Official Windows 10 ISO → Rufus → USB flash drive → boot target PC → Windows Setup
Simply dragging the .iso file onto a USB does not normally create proper bootable installation media. The ISO needs to be written to the USB using a suitable media-creation method.
Create Windows 10 Bootable USB With Rufus
Rufus is a utility specifically designed to format USB drives and create bootable media from bootable ISO images. Its official website lists Windows installation ISOs among the types of images it can use to create USB installation media.
The process is straightforward:
- Connect the USB flash drive.
- Open Rufus.
- Confirm that Rufus has selected the correct USB device.
- Under Boot selection, choose the Windows 10 ISO.
- Select the appropriate partition scheme.
- Confirm the target system.
- Start the process.
- Accept the warning that the USB will be erased.
- Wait for Rufus to finish writing the installation media.
The most important safety step is checking the selected USB device before pressing Start. If you select the wrong removable drive, its contents could be erased.
Bootable USB Rufus Settings for Windows 10
There is no single Rufus configuration that is correct for every computer. The appropriate settings depend primarily on the firmware mode of the target PC.
For a modern computer using UEFI, a typical configuration is:
| Rufus setting | Typical choice for modern UEFI PC |
|---|---|
| Boot selection | Windows 10 ISO |
| Partition scheme | GPT |
| Target system | UEFI |
| Image option | Standard Windows installation |
| File system | Usually the option Rufus recommends for the selected ISO |
For an older computer that genuinely requires Legacy BIOS or BIOS compatibility mode:
| Rufus setting | Typical Legacy configuration |
| Boot selection | Windows 10 ISO |
| Partition scheme | MBR |
| Target system | BIOS or UEFI-CSM |
| Image option | Standard Windows installation |
| File system | Follow the options presented by Rufus |
Microsoft explains that UEFI systems generally use GPT, while legacy BIOS compatibility uses MBR.
That means the practical rule is:
Modern UEFI computer → GPT + UEFI
Older Legacy BIOS computer → MBR + BIOS/UEFI-CSM
Do not blindly copy settings from another computer. A USB that works perfectly on one PC may fail to boot on another if the firmware modes differ.
How to Check Whether Your PC Uses UEFI or Legacy BIOS
If Windows is already installed on the target computer, you can check its firmware mode through System Information.
Press:
Windows + R
Type:
msinfo32
Then press Enter.
Look for:
BIOS Mode
It will normally show either:
- UEFI
- Legacy
This information can help you select the appropriate Rufus configuration.
If you are preparing a USB for a computer with no working operating system, check the firmware setup or boot menu instead.
How to Install Windows 10 From Flash Drive
Once the USB has been created, you can use it to install Windows 10 on the target computer.
Before a clean installation, back up important files. Installing Windows and deleting partitions can permanently remove personal data.
Step 1: Connect the USB
Insert the Windows 10 installation USB into the target computer.
Step 2: Restart the PC
Restart the computer. On a completely blank machine, simply power it on with the USB connected.
Step 3: Open the Boot Menu
During startup, repeatedly press the manufacturer’s boot-menu key.
Common keys include:
- F12
- F11
- F10
- F9
- Esc
- Delete
The correct key varies by manufacturer and model.
Some computers display a message such as Press F12 for Boot Menu during startup.
Step 4: Select the USB
Choose the USB storage device from the boot menu.
On a UEFI computer, you may see an entry similar to:
UEFI: USB Drive
If you intend to install Windows using UEFI, select the UEFI version of the USB entry when it is available.
Step 5: Start Windows Setup
After the USB loads, Windows Setup should appear.
Choose the required:
- Language
- Time and currency format
- Keyboard or input method
Then select Next and Install now.
Step 6: Handle Product Activation
Windows Setup may ask for a product key.
If the computer already has a valid digital Windows license, activation may occur automatically after installation when the PC connects to the internet. Microsoft notes that some modern devices also have their product key embedded in firmware.
Do not assume that creating a USB installer itself provides a Windows license. Installation media and licensing are separate issues.
Step 7: Choose the Installation Type
For a clean installation, choose the custom installation option when presented.
This is the point where you need to be particularly careful.
Deleting or formatting the wrong partition can permanently erase files.
If the computer contains several drives, identify the correct disk by its capacity and configuration before making changes.
Step 8: Select the Installation Drive
Choose the appropriate target partition and continue.
Windows will copy files, install components, and restart the computer several times.
If the computer restarts and returns to Windows Setup from the beginning, remove the USB after the first restart or select the internal drive as the next boot device.
IMAGE PROMPT: “Realistic editorial image of a desktop PC booting into Windows Setup from a USB flash drive, monitor showing the generic Windows installation setup interface without article title, USB drive visible in the computer, darkened room with subtle monitor illumination, straight-on perspective, clean professional technology photography, no unnecessary text”
Alt Text: “PC booting into Windows Setup from a USB flash drive”
CAPTION: “After selecting the USB from the boot menu, Windows Setup can begin the installation process.”
GPT vs. MBR: Which One Should You Use?
GPT and MBR are partition styles used to organize information on a storage drive.
GPT, or GUID Partition Table, is associated with modern UEFI-based systems. MBR, or Master Boot Record, is the older partitioning style commonly associated with Legacy BIOS.
Microsoft explains that when Windows Setup is booted in UEFI mode, the Windows system drive should use GPT.
This distinction matters during a clean installation because an incorrect combination can produce errors such as Windows reporting that the selected disk is not the required GPT or MBR partition style.
If you need to change the target disk’s partition style, back up your data first. Some conversion or clean-install procedures can erase the drive.
Common Windows 10 Bootable USB Problems and Fixes
The USB Does Not Appear in the Boot Menu
Check these possibilities:
- The USB was not created correctly.
- The USB port is not being detected during startup.
- The firmware boot mode does not match the media.
- The USB drive itself is faulty.
- The PC’s boot menu is using a different key than expected.
Try another USB port and verify the USB on another computer if possible.
“No Bootable Device” Appears
This usually means the computer did not find usable boot media.
Recreate the USB and confirm that the correct ISO and partition scheme were used. On systems with UEFI and Legacy/CSM options, also verify which boot mode the computer is using.
Windows Says the Disk Uses the Wrong Partition Style
This commonly happens when the boot mode and target disk’s partition style do not match.
For example, a PC booted in UEFI mode expects a GPT-configured Windows installation disk. Microsoft documents the relationship between UEFI, Legacy BIOS, GPT, and MBR in its Windows Setup guidance.
Rufus Warns That the USB Will Be Erased
That warning is normal.
Rufus must format and write the installation image to the selected USB. The important part is confirming that the correct USB drive is selected.
Windows Setup Fails During Installation
Possible causes include:
- Corrupted installation media.
- A defective USB drive.
- Hardware compatibility problems.
- Incorrect firmware settings.
- An incorrectly selected target disk.
- A damaged or incomplete ISO download.
Once your Windows 10 USB is working, some installation problems may still be related to firmware settings, hardware compatibility, drivers, or other PC configuration issues. For more practical guides covering computers, software, and related topics, you can also explore Technology on WorldlyVoice.
Media Creation Tool vs. Rufus
Both methods can produce useful Windows 10 installation media, but they suit different situations.
| Feature | Media Creation Tool | Rufus |
| Beginner-friendly | Excellent | Good |
| Downloads Windows files | Yes | No, if you already have the ISO |
| Uses an ISO directly | Can create one | Yes |
| Partition configuration control | Limited | Greater |
| Useful when you already have an ISO | Less necessary | Excellent |
| Best for a straightforward USB | Yes | Yes |
| UEFI/MBR control | Less direct | More direct |
For most beginners, Media Creation Tool is the simpler choice because Microsoft provides the tool specifically for creating installation media.
Rufus makes more sense when you already have an official ISO or need greater control over the USB’s boot configuration.
How to Verify a Windows 10 ISO
If you download an ISO and want additional confidence that the file is intact, you can calculate its SHA-256 hash with PowerShell.
For example:
Get-FileHash "C:\Users\YourName\Downloads\Windows10.iso"The resulting hash can be compared with the corresponding value published by the source when hash information is provided.
For the safest approach, download Windows installation files directly from Microsoft rather than relying on unofficial ISO repositories.
Mistakes to Avoid
Before creating or using your Windows 10 USB, check these common mistakes:
- Using an unofficial or modified ISO.
- Forgetting that the USB will be erased.
- Selecting the wrong drive in Rufus.
- Choosing GPT or MBR without considering the target PC’s firmware.
- Deleting partitions without a backup.
- Unplugging the USB while it is being created.
- Assuming a bootable USB contains a Windows license.
- Installing Windows 10 on a PC that could instead run a supported Windows release without considering the security implications.
- Assuming Windows 10 receives normal free security updates in 2026.
Frequently Asked Questions
How do I create a Windows 10 bootable USB?
The easiest method is Microsoft’s Media Creation Tool. Download the official tool, choose to create installation media for another PC, select USB flash drive, choose the correct settings, and let the tool prepare the drive. Microsoft recommends a blank USB with at least 8 GB.
Can I make Windows 10 bootable USB from an ISO?
Yes. You can use an official Windows 10 ISO with Rufus to create bootable installation media. Rufus is designed to create bootable USB drives from ISO images.
What Rufus settings should I use for Windows 10?
For a modern UEFI computer, GPT with UEFI is generally appropriate. Older systems using Legacy BIOS commonly use MBR with BIOS or UEFI-CSM. The correct configuration depends on the target computer.
How do I boot Windows 10 from a USB flash drive?
Insert the USB, restart the computer, open the manufacturer’s boot menu, and select the USB device. On UEFI systems, select the UEFI USB entry when appropriate.
Can I install Windows 10 without entering a product key?
A product key may not be required during installation if the computer already has a valid digital license or an embedded key that matches the Windows edition being installed. Activation requirements still apply.
Is Windows 10 still supported in 2026?
Standard Windows 10 support ended on October 14, 2025. Eligible devices can receive additional security updates through Microsoft’s ESU program, but normal Windows 10 support has ended.
Conclusion
If you need to create Windows 10 bootable USB media, Microsoft’s Media Creation Tool is usually the easiest route. It handles the download and preparation process for you and is well suited to users who simply need a working Windows 10 installer.
If you already have an official ISO, Rufus is a useful alternative because it gives you more control over how the USB is prepared. For modern UEFI computers, GPT and UEFI are generally the appropriate pairing; older Legacy BIOS systems may require MBR instead.
Before a clean installation, back up your files and carefully identify the target drive. A bootable USB makes Windows installation possible, but it does not eliminate the risks associated with deleting or formatting partitions.
Finally, remember that this is a 2026 Windows 10 guide: Windows 10’s standard support ended in October 2025. If your hardware supports Windows 11, consider whether installing an operating system that remains in standard support is the better choice. If Windows 10 is necessary for compatibility or another legitimate reason, understand its current support limitations and investigate ESU eligibility where applicable.
