


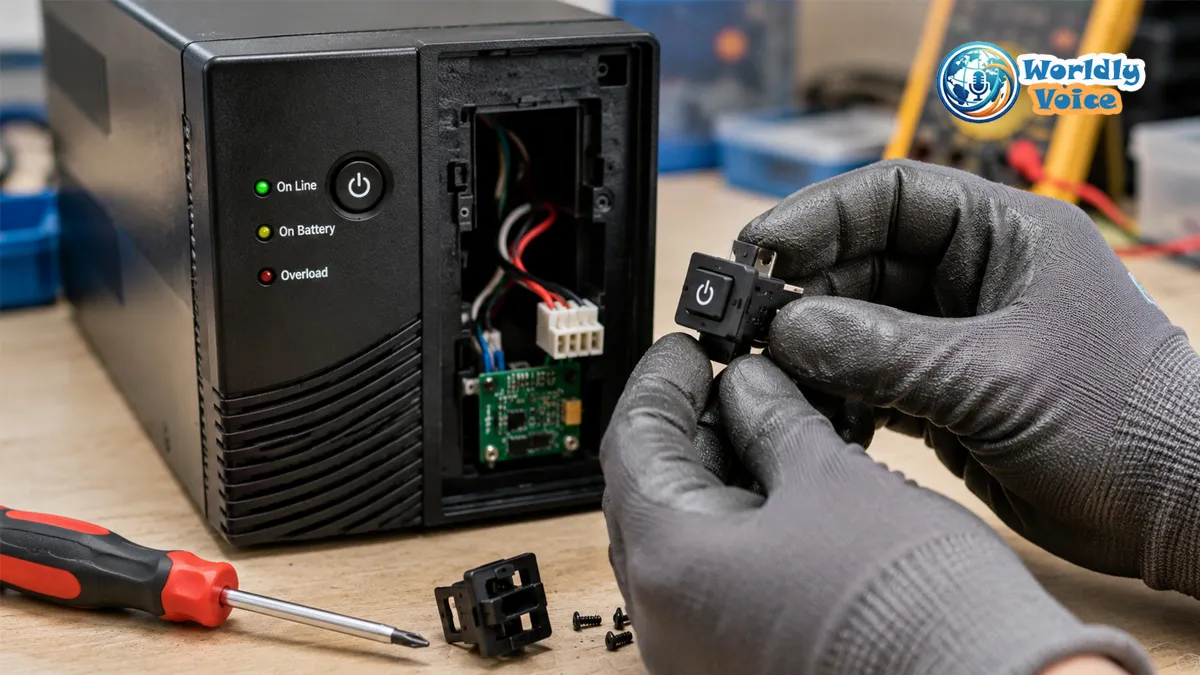
A UPS can look completely dead when its power button stops responding, but the button is not always the real problem. If you are searching for how to replace UPS button, the first step should actually be diagnosis. A loose plastic cap, stuck actuator, failed tactile switch, disconnected battery, tripped circuit breaker, or internal electronic fault can all produce similar symptoms.
That distinction matters because a simple external button replacement is very different from repairing a switch soldered to a circuit board. Some UPS manufacturers also specifically warn against opening their enclosures because internal components can present dangerous electrical hazards. APC, for example, states that its Smart-UPS and Back-UPS enclosures are not field-serviceable and may contain dangerous high voltage.
This battery backup repair guide explains how to identify the likely failure, what you can safely check first, and when a UPS power button replacement is reasonable versus when professional service is the better choice.
Why Is My UPS Power Button Not Working?
A UPS power button can fail in several ways. The physical button may be stuck, cracked, loose, or pushed inside the front panel. Alternatively, the button can feel completely normal while the UPS remains unresponsive.
Common symptoms include:
- The button will not move.
- The button remains pressed after you release it.
- The button feels loose or unusually soft.
- The plastic button cap has fallen inside the front panel.
- The button clicks, but nothing happens.
- The UPS starts only intermittently.
- The UPS appears dead even though it is connected to AC power.
The important question is whether you have a mechanical button problem or an electrical/startup problem.
For example, an APC UPS troubleshooting guide lists several causes of a UPS failing to turn on, including the unit not being connected to utility power and very low or absent input voltage. Other UPS documentation also identifies battery condition and internal faults as possible causes.
So don’t order a replacement switch simply because pressing the button produces no response.
What Is a UPS Power Button?
The part you press on the front of a UPS may be only the outermost part of a small control assembly.
Depending on the model, it can include:
- A plastic external button cap
- A plastic actuator or plunger
- A mounting bracket or front-panel mechanism
- A tactile push-button or microswitch
- A small control board
- A cable, connector, or ribbon cable connecting the panel to other electronics
Think of the arrangement like a doorbell. The plastic button you touch is not necessarily the electrical switch itself. Pressing the outside button may simply move a small actuator that operates an electronic switch underneath.
That is why UPS power button replacement can mean two completely different repairs.
If only the plastic cap is broken, the repair may involve replacing a mechanical component. If the microswitch on the circuit board has failed, the repair can require board-level electronics work.
What Causes a UPS Power Button to Fail?
Dirt or debris
Dust, grime, or sticky residue around the front-panel opening can restrict movement. Before opening the UPS, inspect the button edges and check whether the actuator can move freely.
Do not pour or spray liquid cleaner into the button opening.
A stuck or misaligned actuator
A plastic plunger can become displaced or damaged. The button may remain partially depressed, scrape against the front panel, or fail to return to its normal position.
If this happens, forcing the button can make the damage worse.
A broken plastic button cap
Older battery backup units can develop cracked plastic, broken clips, or loose front-panel components. In this situation, the electronic switch underneath may still be perfectly functional.
Replacing the external button assembly may therefore be enough.
A worn tactile switch or microswitch
If the button moves correctly but does not produce the expected response, the electrical switch underneath may be defective.
Replacing a soldered switch is considerably more advanced than replacing a plastic button. The replacement must match the original component’s dimensions, pin arrangement, actuation height, mounting style, and electrical characteristics.
A loose front-panel connection
Some UPS designs use a separate front-panel assembly connected to the electronics through a cable or connector. A damaged or disconnected connection can prevent the button signal from reaching the control electronics.
The button is fine and another UPS component has failed
This is one of the most important possibilities to consider.
A UPS may refuse to start because of:
- A disconnected or failed battery
- A tripped circuit breaker
- Insufficient utility power
- An overload condition
- An internal control fault
- Another power-electronics problem
CyberPower, for example, notes that a malfunctioning or dead battery can cause loss of power from its battery/surge outlets, while its support documentation also identifies resettable circuit breakers as part of UPS protection.
Before You Replace the UPS Button: Troubleshooting Checklist
Do these basic checks before considering disassembly.
1. Check the wall outlet
Plug a known-working device into the same outlet to verify that utility power is available.
If the outlet is dead, replacing the UPS button will not solve the problem.
2. Inspect the UPS power cord
Make sure the power cord is properly connected and has no obvious damage.
Do not use a visibly damaged cord as a troubleshooting shortcut.
3. Check the rear circuit breaker
Some UPS models have a resettable circuit breaker on the rear panel. CyberPower describes its red rear buttons as circuit breakers; when tripped, the button may protrude farther than normal and can be reset according to the product instructions.
Only reset a breaker according to the manufacturer’s instructions. If it immediately trips again, investigate the underlying problem rather than repeatedly resetting it.
4. Check the battery status and connection
A disconnected, depleted, or failed battery can cause startup or backup problems.
If your model has an approved user-accessible battery compartment, follow the manufacturer’s exact battery procedure. Do not assume that because one UPS permits user battery replacement, its internal electronics are also intended for user repair.
5. Observe LEDs, alarms, or the display
Before opening anything, note exactly what the UPS does.
Look for:
- No indicator lights
- A flashing power indicator
- Replace-battery warnings
- Continuous or repeating beeps
- An LCD fault message
- Normal startup followed by immediate shutdown
The meaning of these signals varies by model, so the correct manual is more useful than a generic interpretation.
Is It Safe to Repair a Battery Backup Unit at Home?
For the search question is it safe to repair a battery backup unit at home, the answer depends heavily on what you are repairing.
A simple external inspection or replacement of a manufacturer-approved user-accessible component is not the same as opening the main UPS enclosure and working on its power circuitry.
APC explicitly says its Smart-UPS and Back-UPS cases should not be opened by users because they may contain dangerous high voltage. APC also distinguishes this from certain user-replaceable batteries that are accessed through dedicated battery compartments isolated from the inner electronics.
Electrical equipment can also contain stored energy after it has been disconnected. OSHA’s electrical-safety requirements address stored electrical energy and specifically recognize capacitors as components that may require appropriate discharge procedures before equipment is treated as safe to work on.
For that reason, relatively low-risk tasks can include:
- Cleaning around an external button
- Inspecting the external button mechanism
- Replacing a manufacturer-approved external component
- Performing a manufacturer-approved battery replacement
Higher-risk work includes:
- Repairing the main circuit board
- Replacing capacitors
- Working around transformers or high-voltage sections
- Repairing internal power circuitry
- Soldering components on an energized or inadequately isolated board
If repairing the switch requires access to the UPS’s internal power electronics, professional service is the safer choice.
Tools You May Need
For a simple mechanical button repair, you may need:
- A suitable screwdriver set
- A plastic pry tool
- A soft brush
- Needle-nose pliers where appropriate
A switch-level electronics repair may additionally require:
- A multimeter
- Soldering equipment
- Desoldering braid or a pump
- The correct replacement switch
- Appropriate electronics-repair experience
Do not choose a replacement switch merely because it looks similar. Two push-button switches can have different pin layouts, mounting dimensions, electrical ratings, and actuator heights.
How to Replace a UPS Button Step by Step
The following process is intentionally general because there is no universal UPS enclosure design. The safest procedure is always the one specified for your exact model.
Step 1: Identify the exact UPS model
Find the model number on the rear, bottom, or side label.
Record the model before searching for replacement parts. If possible, also note the product family and revision information.
This matters because button assemblies and internal layouts can differ even between products from the same manufacturer.
Step 2: Find the manufacturer’s documentation
Locate the manual or support page for that exact model before removing screws.
For APC equipment, the official support system provides product-specific manuals, troubleshooting information, replacement-battery resources, and service options. APC Support Center
CyberPower likewise maintains a model-specific support library containing user manuals and other product documentation. CyberPower Support Resources
Step 3: Shut down connected equipment
Safely shut down computers, networking equipment, storage devices, and other loads connected to the UPS.
Do not begin mechanical work while depending on the UPS to protect an active computer or other critical equipment.
Step 4: Turn off and disconnect the UPS
Turn the UPS off according to its normal operating procedure and disconnect connected equipment.
Then disconnect the UPS from utility power.
Do not treat pressing the front power button as proof that every internal circuit is de-energized.
Step 5: Follow the model-specific battery procedure
If the manufacturer’s instructions require battery isolation for the relevant service operation, follow those instructions exactly.
APC states that user-replaceable battery compartments are designed differently from the internal electronics, while some other UPS models have different servicing arrangements.
Step 6: Inspect the external button first
Look for:
- A cracked button cap
- Broken retaining clips
- A displaced actuator
- Rubbing against the front panel
- A button that does not return normally
If the button mechanism is visibly broken, you may have identified the fault without touching the circuit board.
Step 7: Access the front-panel assembly only when appropriate
The exact method varies considerably.
A front panel may use screws, clips, a separate assembly, or a cable connection. Some models integrate the controls much more deeply into the enclosure.
If the manufacturer’s documentation does not support user access to the area, stop rather than improvising.
If you are appropriately qualified to continue, take clear reference photos before disconnecting cables. This reduces the risk of reinstalling a connector incorrectly.
Step 8: Identify the failed component
Use the symptoms to narrow down the repair:
| Symptom | Possible problem | Likely direction |
|---|---|---|
| Button is physically stuck | Debris or damaged actuator | Clean or replace mechanical part |
| Button is loose | Broken clips or mount | Replace button assembly |
| Button clicks but UPS does nothing | Switch, battery, breaker, or internal fault | Diagnose before replacing parts |
| No tactile click | Failed or damaged switch | Switch replacement may be required |
| Button works intermittently | Worn switch or loose connection | Inspect the relevant assembly |
This diagnosis is more important than simply following a generic “replace the switch” tutorial.
Step 9: Replace the mechanical button if that is the failed part
For an external plastic component, the general process is:
- Remove the damaged button or actuator according to the model instructions.
- Inspect the surrounding mechanism for broken pieces.
- Install the correct replacement.
- Check that the button moves freely.
- Reassemble the front panel correctly.
Do not glue a button permanently into position if doing so prevents the actuator from moving normally.
Step 10: Treat electronic switch replacement as advanced repair
A soldered tactile switch is a different job.
A qualified electronics technician may need to remove the relevant control board, identify the exact switch specification, desolder the defective component, install a compatible replacement, inspect the solder joints, and reassemble the equipment.
This is not a universal DIY procedure. The safe approach depends on the UPS design, isolation procedure, technician’s skills, and manufacturer’s service instructions.
APC Back-UPS Power Switch Replacement Guide
An APC Back-UPS power switch replacement guide cannot safely be reduced to one set of enclosure-opening instructions because Back-UPS models vary substantially.
Before buying a replacement button, identify the exact model and determine whether the manufacturer offers an external replacement component or a supported service procedure.
For an APC Back-UPS that will not start, a sensible diagnostic sequence is:
- Verify utility power.
- Confirm the UPS power connection.
- Check the applicable circuit breaker.
- Check the battery according to the model instructions.
- Observe LEDs and alarms.
- Determine whether the physical button is actually damaged.
- Consult the model-specific APC documentation.
- Use authorized service when the suspected problem involves internal electronics.
APC documentation also warns that an internal fault should not be treated as a simple button problem.
How to Fix a Stuck Power Button on an Uninterruptible Power Supply
If you are looking for how to fix a stuck power button on uninterruptible power supply, begin with the least invasive solution.
Do not force the button. Excessive pressure can break the plastic actuator or damage the switch underneath.
Instead, inspect the button edges for dust, sticky residue, cracks, or obvious misalignment. Press it gently and release it. A healthy mechanical button should generally return to its normal position rather than remaining depressed or scraping against the casing.
Avoid spraying liquid cleaners into the opening.
If the button remains stuck after external inspection, the next step depends on the model. If opening the case is prohibited by the manufacturer or would expose you to internal power circuitry, stop and seek service rather than improvising.
CyberPower UPS Repair and Button Troubleshooting
For cyberpower UPS repair and button troubleshooting, use the same diagnostic principle: identify the exact model before ordering parts.
CyberPower UPS products differ in button arrangements, displays, battery access, and internal construction. Some models use conventional power buttons, while others incorporate more sophisticated controls.
Start by checking the wall outlet, UPS input connection, circuit breaker, battery condition, connected load, and visible indicators. CyberPower’s official support library provides model-specific manuals and product resources, which should take priority over generic repair instructions.
Do not assume that a replacement button from one CyberPower UPS will fit another model.
How to Test Your UPS After Replacing the Button
Before reconnecting valuable equipment, inspect the unit carefully.
Check that:
- The enclosure or accessible panel is properly installed.
- Screws and clips are accounted for.
- No cable is pinched.
- The button moves normally.
- There are no loose parts inside the accessible assembly.
Then perform the manufacturer’s recommended startup procedure.
Watch the power indicator and listen for unusual alarms. If the model supports a self-test, follow its documented procedure. CyberPower, for example, provides a self-test procedure through its PowerPanel software and describes an alternative test method involving interruption of the UPS’s utility input.
Reconnect equipment gradually rather than immediately applying a maximum load. If the UPS behaves abnormally after the repair, disconnect the load and investigate rather than continuing to operate it.
When a New Power Button Does Not Fix the UPS
A successful button replacement does not guarantee that the UPS itself will start.
If the new button operates correctly but the unit remains dead, reconsider the diagnosis.
Possible causes include:
- A depleted or failed battery
- A disconnected battery
- A tripped circuit breaker
- Utility-power problems
- An overload condition
- A charging-system fault
- A failed control board
- An internal power-electronics fault
This is why UPS not turning on troubleshooting should always begin with basic power and battery checks.
A button is only one part of the startup system. Replacing it cannot repair a failed battery charger or damaged control circuitry.
Should You Repair or Replace the UPS?
Repair can make sense when the fault is clearly limited to an external mechanical button, the unit is otherwise healthy, and the correct replacement part is available.
Replacement may be more sensible when the UPS has several problems, the battery is already near the end of its useful life, replacement parts are unavailable, or the suspected fault is inside the main power electronics.
The age of the UPS also matters. Spending significant money on board-level repair for an older unit with a worn battery may not be economically sensible.
Most importantly, do not bypass the power switch permanently just to make the UPS operate. The control system was designed around the manufacturer’s intended switching arrangement.
Frequently Asked Questions
Can I replace the power button on my UPS?
Sometimes. If the damaged component is only the external plastic button or actuator, replacement can be relatively straightforward on some models. A failed electronic switch attached to a circuit board is a more advanced repair.
Why does my UPS power button click but the UPS will not turn on?
The switch may not be the problem. Check utility power, the input connection, circuit breaker, battery condition, overload status, and model-specific fault indicators before replacing the switch.
How do I fix a stuck UPS power button?
Start by inspecting the button for debris, cracking, or misalignment. Do not force it or spray liquid into the opening. If the mechanical assembly is damaged, replace the appropriate component if the manufacturer supports that repair.
Can I use any push button to replace my UPS switch?
No. A replacement must be compatible with the original component’s physical dimensions, mounting arrangement, pin configuration, actuator height, and electrical specifications.
Is it safe to repair a UPS at home?
Limited external maintenance or a manufacturer-approved user-replaceable component may be appropriate for some models. Opening the main enclosure and working on internal power electronics is a different matter and can expose you to hazardous electrical energy. Follow the manufacturer’s instructions and use qualified service for internal electrical repairs.
Why won’t my APC Back-UPS turn on?
Possible causes include utility-power problems, a disconnected or depleted battery, a tripped breaker, or an internal fault. Check the model-specific troubleshooting instructions before assuming the power button needs replacement.
Conclusion
Replacing a UPS button is possible in some situations, but the smartest repair usually begins by proving that the button is actually defective.
If the external plastic actuator is cracked, stuck, or loose, a mechanical UPS power button replacement may solve the problem. If the button feels normal but the UPS remains completely unresponsive, investigate the battery, utility input, circuit breaker, overload condition, and fault indicators before opening the enclosure.
The key principle is simple: diagnose first, isolate power correctly, and only perform repairs appropriate to the UPS model and your level of experience.
If the job requires working on the main circuit board, capacitors, transformer, high-voltage wiring, or other internal power electronics, professional service is the safer option. A replacement button is inexpensive compared with the potential consequences of treating a UPS like an ordinary low-voltage electronic device.
